Artisan Sourdough Made Simple: A Beginner’s Guide to Baking Like a Pro
The Magic of Sourdough
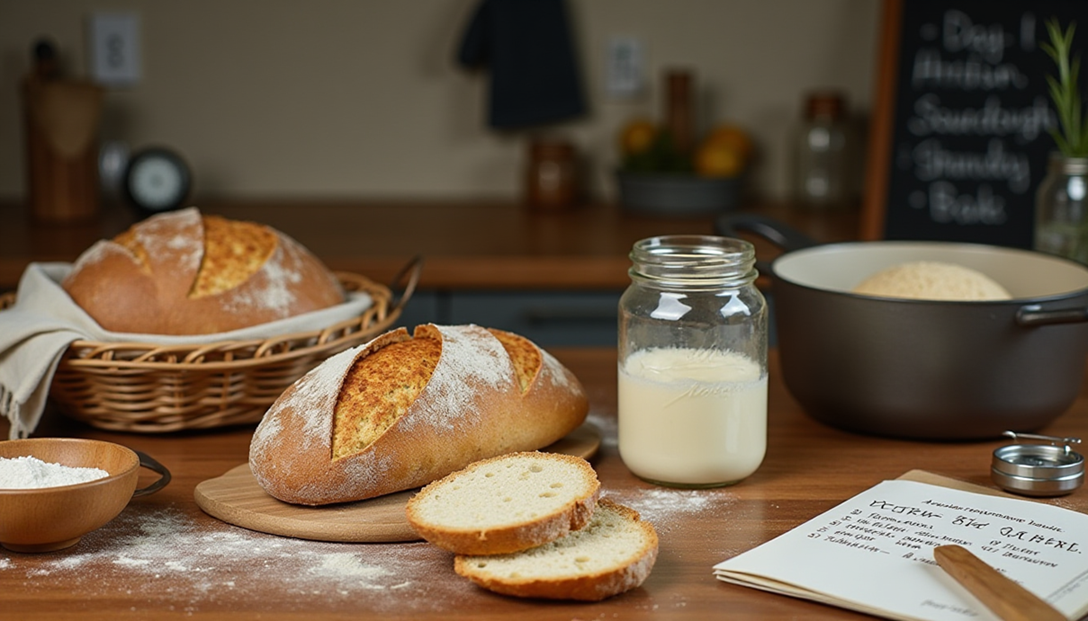
There’s something deeply satisfying about pulling a golden, crusty loaf of sourdough bread from your oven. The tangy aroma, the chewy crumb, and the crisp crust are the hallmarks of artisan bread—something many assume is only achievable by professional bakers. But here’s the secret: artisan sourdough can be simple. With a few key techniques, a little patience, and this guide, you’ll be baking bread that rivals your local bakery in no time.
Why Bake Sourdough?
Sourdough isn’t just bread—it’s a tradition, a science, and a labor of love. Here’s why it’s worth your time:
- Flavor: The slow fermentation process develops complex, tangy flavors that store-bought bread can’t match.
- Health Benefits: Natural fermentation makes sourdough easier to digest and can lower the glycemic index.
- No Preservatives: You control the ingredients—just flour, water, and salt.
- Versatility: Use your sourdough starter for bread, pancakes, pizza dough, and more.
Getting Started: What You Need
You don’t need a fancy kitchen to bake sourdough. Here’s the minimalist list:
Essential Tools
- A Glass Jar: For your sourdough starter.
- Kitchen Scale: For precise measurements.
- Mixing Bowl: Any large bowl will do.
- Dough Scraper: Helps with shaping and handling sticky dough.
- Proofing Basket (Banneton): Optional but helpful for shaping.
- Dutch Oven or Baking Stone: Creates steam for a crispy crust.
- Linen Cloth or Tea Towel: For covering dough during proofing.
Ingredients
- Flour: Start with unbleached bread flour or whole wheat flour.
- Water: Filtered or dechlorinated.
- Salt: Enhances flavor and controls fermentation.
Step 1: Create Your Sourdough Starter
Your sourdough starter is the heart of your bread. It’s a live culture of wild yeast and bacteria that ferments your dough.
Day 1-5: Feeding Your Starter
- Mix: Combine 50g whole wheat flour + 50g water in a jar. Stir well.
- Cover: Use a breathable cloth or loose lid.
- Rest: Let it sit at room temperature (70-75°F or 21-24°C).
- Feed Daily: Discard half, then add 50g flour + 50g water. Stir.
Signs of Life:
- Bubbles forming on top and sides.
- A slightly sour, yeasts aroma.
- Doubling in size within 4-8 hours after feeding.
Tip: If your starter isn’t bubbly after 5 days, keep feeding it daily. Some starters take up to 2 weeks to mature.
Step 2: Mixing and Autolyse
Mixing the Dough
- Combine: 500g bread flour, 350g water (70% hydration), and 10g salt in a bowl.
- Add Starter: 100g of active, bubbly starter.
- Mix: Stir until no dry flour remains. The dough will be shaggy—that’s okay!
Autolyse (Resting the Dough)
- Let the dough rest for 30-60 minutes. This allows the flour to hydrate and gluten to develop naturally.
Step 3: Bulk Fermentation
This is where the magic happens. The dough ferments, developing flavor and structure.
- Stretch and Fold: Every 30 minutes for the first 2 hours, wet your hands and gently stretch the dough from one side, folding it over itself. Repeat 4 times (top, bottom, left, right).
- Rest: Let the dough ferment at room temperature for 4-6 hours, or until it’s 50-75% larger.
Tip: If your kitchen is cool, extend fermentation time. If it’s warm, reduce it.
Step 4: Shaping Your Loaf
- Turn Out: Gently turn the dough onto a lightly floured surface.
- Pre-Shape: Form into a round (boule) or oval (batard). Let it rest for 20 minutes.
- Final Shape: Tighten the dough by pulling the edges toward the center and rolling it into a smooth ball or log.
- Place in Basket: Dust a proofing basket with flour, place the dough seam-side up, and cover with a cloth.
Step 5: Final Proof
Let the dough proof in the fridge for 8-12 hours (or at room temperature for 1-2 hours). Cold proofing enhances flavor and makes scoring easier.
How to Tell It’s Ready:
- The dough should spring back slowly when poked.
- It should have risen but not doubled in size.
Step 6: Baking Your Sourdough
- Preheat: Place your Dutch oven in the oven and preheat to 475°F (245°C) for 30 minutes.
- Score: Turn the dough onto parchment paper, and use a razor or sharp knife to score the top (this allows steam to escape).
- Bake:
- 20 minutes with the lid on (to create steam).
- 20-25 minutes with the lid off (to brown the crust).
- Cool: Let the bread cool on a rack for at least 1 hour before slicing.
Tips for Success
- Consistency: Feed your starter regularly, even if you’re not baking.
- Patience: Sourdough can’t be rushed. Let time work for you.
- Experiment: Try different flours (rye, spelt) or add-ins (seeds, nuts).
- Community: Join sourdough groups online for tips and inspiration.
Beyond Bread: Creative Uses for Your Starter
Your sourdough starter isn’t just for bread! Try these ideas:
- Sourdough Pancakes: Light, tangy, and perfect for weekends.
- Sourdough Pizza Dough: Crispy, chewy, and full of flavor.
- Sourdough Crackers: Thin, crispy, and customizable with herbs or spices.
- Sourdough Waffles: A delicious twist on a classic breakfast.
Conclusion: Embrace the Process
Baking artisan sourdough is a journey, not a destination. Each loaf teaches you something new, and every slice is a reward for your patience and care. Remember, even the most experienced bakers started with a simple jar of flour and water. With this guide, you’re well on your way to creating bread that’s not just food, but a work of art.
Now, roll up your sleeves, feed your starter, and happy baking! 🍞✨